Time-Telling Concepts: Your Complete Analog Clock Guide
Welcome to the ultimate guide to time-telling! For parents and teachers, introducing children to the world of analog clocks can feel like a daunting task. With its hands, numbers, and tricky concepts like 'half past' and 'quarter to,' it's easy for young learners to get confused and discouraged. But what if you had a roadmap to make this journey smooth and enjoyable? This comprehensive guide breaks down all the essential time telling concepts into simple, bite-sized steps, setting your child up for success. We'll demystify the clock face and show you how to teach kids to tell time using interactive and fun methods.
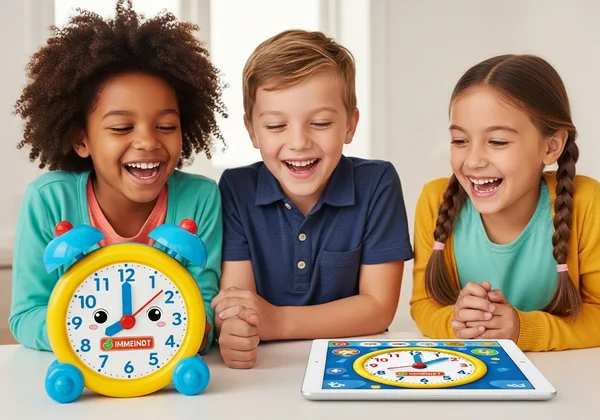
The key to mastery is practice, and that's where we come in. Throughout this guide, we’ll show you how the right tools can transform learning from a chore into a delightful game. With an interactive clock, abstract ideas become concrete, hands-on experiences.
Mastering Time: A Step-by-Step Learning Guide
Before diving into complex terms, it's crucial to build a strong foundation. This section walks you through the absolute basics, creating the perfect launchpad for your child's time-telling adventure. We’ll start with the "what" and "why" before moving to the "how."
What is an Analog Clock & Why Do We Still Use Them?
An analog clock is a timepiece with a circular face and rotating hands that point to numbers to show the time. Unlike a digital clock that simply displays numbers, an analog clock provides a visual representation of time's passage. You can see the hands physically moving, giving a tangible sense of duration.
But in a world of smartphones and digital displays, why are analog clocks still taught in schools? The benefits are significant. Learning to read an analog clock helps children develop crucial cognitive skills like spatial reasoning, number sense, and understanding fractions (quarters and halves). It teaches them about the cyclical nature of time and helps them better estimate how long an activity will take, a skill that digital clocks don't foster as effectively.

Deconstructing the Clock: The Hour and Minute Hands Explained
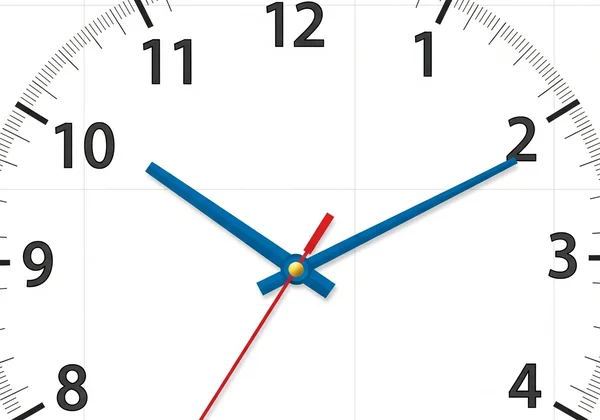
The magic of an analog clock lies in its hands. At first, they can seem confusing, but they each have a very specific job. On our Fun Clock Playground, we’ve made them distinct to help learners.
- The Hour Hand (The Short, Blue Hand): This is the shorter, slower hand. It points to the big numbers on the clock (1 through 12) to tell you the hour. Since it moves slowly, it only travels from one number to the next over the course of a full hour.
- The Minute Hand (The Long, Red Hand): This is the longer hand, and it moves much faster than the hour hand. It completes a full circle around the clock face every hour. Its job is to point to the minute marks to tell you how many minutes have passed in the current hour.
Explaining this difference is the first major step. A great way to practice is by using a hands-on tool where a child can move the hands themselves. Our teaching clock allows you to isolate each hand, making it easier to explain its unique role.
How Do You Read an Analog Clock Step by Step?
Once your child understands the jobs of the hour and minute hands, you can introduce a simple, two-step process to read the time. Encourage them to follow these steps every time they look at the clock.
- Find the Hour First: Instruct your child to always look for the short, blue hour hand first. See which number it has just passed. That number is the current hour. If it's pointing directly at a number, that's the hour. If it's between two numbers, the hour is always the smaller of the two numbers.
- Read the Minutes Next: Now, find the long, red minute hand. To read the minutes, your child will need to count by fives starting from the number 12. Each big number on the clock represents five minutes (1 is 5 minutes, 2 is 10 minutes, and so on).
- Put It All Together: Combine the hour and the minutes. For example, if the hour hand is past the 4 and the minute hand is on the 3 (which is 15 minutes), the time is 4:15.
This process takes repetition. The best way to build confidence is to practice these steps with an interactive tool that provides immediate digital feedback, confirming their answers and reinforcing their learning.
Understanding Key Analog Clock Terms
With the basics down, it’s time to introduce the special vocabulary associated with telling time. These phrases are shortcuts that make talking about time easier, but they often trip up new learners. Let's break them down one by one.
The Basics: What Does 'O'Clock' Mean?
"O'clock" is one of the first time-telling phrases a child learns. It's a simple and satisfying concept. "O'clock" means "of the clock," and it is used when the long minute hand is pointing directly up at the number 12. This signifies the start of a new hour.
So, when the short hour hand is on the 7 and the long minute hand is on the 12, it is exactly 7 o'clock. This is a perfect starting point because it isolates the hour hand, allowing a child to focus on just one thing.
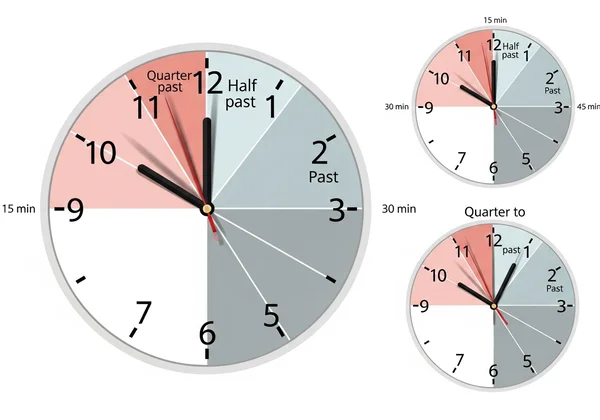
Decoding 'Half Past' the Hour for Kids
The concept of what is half past is the next logical step. "Half past" simply means 30 minutes have passed since the beginning of the hour. On an analog clock, this occurs when the long minute hand has traveled halfway around the clock face and is pointing directly down at the number 6.
For example, "half past two" is another way of saying 2:30. The hour hand will be halfway between the 2 and the 3, and the minute hand will be on the 6. Visually demonstrating this on a clock is key. You can set half past on our online clock to show how the hands move to this position.
Mastering Quarter Past and Quarter To
This is where things can get a little trickier, but the concepts are based on fractions. Just as a pizza can be cut into quarters, an hour can be divided into four 15-minute quarters.
- Quarter Past: This means 15 minutes have passed since the hour started. The minute hand has traveled a quarter of the way around the clock and is pointing at the number 3. So, "quarter past 10" is 10:15.
- Quarter To: This concept looks forward to the next hour. It means there are 15 minutes until the next hour begins. The minute hand is pointing at the number 9. For example, "quarter to 5" means it is 15 minutes until 5:00, or 4:45.
These terms require a bit more abstract thinking. Letting a child play with quarters on an interactive clock can help solidify their understanding by allowing them to see the relationship between the hand positions and the digital time.
Counting Minutes: The Easy Way (by Fives)
While 'quarter past' and 'half past' are useful, knowing how to count the exact minutes is the ultimate goal. The secret is learning to count by fives. Each number on the clock face represents a group of five minutes for the minute hand.
- 1 = 5 minutes
- 2 = 10 minutes
- 3 = 15 minutes
- 4 = 20 minutes
- ...and so on, all the way to 12 (which represents 0 or 60 minutes).
This is a foundational skill for accurate time-telling. Our adjustable clock is perfect for this, as a child can drag the minute hand from one number to the next and watch the digital display update in real-time, reinforcing the five-minute intervals.
Advanced Time Concepts: Beyond the Basics
Once a child is comfortable with the clock face and basic terms, you can introduce a few more advanced concepts to complete their understanding of time.
Deciphering AM and PM: Morning vs. Afternoon
The hands on an analog clock go around twice every day. This is where AM and PM come in. They tell us whether it's the first half of the day or the second.
- AM (Ante Meridiem): This is Latin for "before midday." It covers the time from midnight (12:00 AM) to just before noon (11:59 AM). These are the morning hours.
- PM (Post Meridiem): This means "after midday." It covers the time from noon (12:00 PM) to just before midnight (11:59 PM). These are the afternoon and evening hours.
Relating AM and PM to daily routines works best. For example, "We eat breakfast at 7 AM," and "We read a bedtime story at 8 PM."
An Introduction to the 24-Hour Clock (Military Time)
While not as common in daily conversation in some countries, the 24-hour clock (often called military time) is used worldwide in many fields to avoid AM/PM confusion. In this system, the day runs from 00:00 (midnight) to 23:59.
For times after noon, you simply continue counting up from 12. So, 1:00 PM becomes 13:00, 2:00 PM is 14:00, and so on. This is a useful concept to introduce, as it broadens a child's understanding of how time can be measured and displayed.
Ready to Master Time? Start Your Fun Learning Journey Now!
You've now got the map to analog time mastery! From deciphering hands to understanding 'quarter to,' this guide has laid out every step. The real magic happens with hands-on practice, turning abstract concepts into joyful discoveries. Forget just reading; let's play to learn!
Ready to put your knowledge to the test and make learning time truly fun?
👉 Start learning with our fun analog clock tool now!
Frequently Asked Questions About Time-Telling
What is the difference between an analog and digital clock?
An analog clock uses moving hands on a numbered dial to show time, offering a visual representation of time's passage. A digital clock displays the time as numerical digits (e.g., 10:30). While digital clocks are easier to read at a glance, analog clocks are better for teaching the concept and duration of time.
What age should a child be able to read an analog clock?
Most children are developmentally ready to start learning to tell time between the ages of 6 and 8. Typically, they master telling time to the hour and half-hour first, and then progress to quarters and individual minutes as their counting skills improve. Every child learns at their own pace, so patience and fun are key.
Are analog clocks better for learning for kids?
Yes, educators widely agree that analog clocks are superior for learning. They help children visualize the passage of time, understand concepts like "before" and "after," and build foundational math skills related to fractions and counting by fives. This visual learning strengthens a child's overall understanding of time as a concept.
How can I make learning to tell time fun for my child?
The best way to make learning fun is to turn it into a game! Use an interactive tool, set "mystery time" challenges, and relate time-telling to their favorite daily activities. The goal is to remove the pressure and foster curiosity. For a variety of engaging activities, check out our telling time games and see how a playful approach can make all the difference.