Teaching Time: A 5-Day Interactive Clock Lesson Plan
Teaching children to tell time can feel like a monumental task. The abstract concept of hours and minutes, the confusing dance of the long and short hands—it's enough to make any student's (and teacher's) head spin. Static worksheets and traditional model clocks often fail to capture the attention of today's tech-savvy kids. How can you make learning to tell time an adventure instead of a chore? The answer lies in making the lesson dynamic, engaging, and hands-on with a powerful interactive clock.
This five-day lesson plan is designed for elementary school teachers and homeschooling parents who want to transform their time-telling unit. By pairing structured daily activities with our free, intuitive interactive clock, you can make learning time the highlight of the week. This guide will walk you through a step-by-step process that builds confidence and ensures mastery, all while your students are having fun. Get ready to explore a better way to teach with our free tool.

Day 1: Mastering the Basics with Time Telling Activities
The first day is all about building a solid foundation. Before students can read a clock, they need to understand its parts and their basic functions. We'll demystify the clock face and introduce the all-important hands in a way that is simple and memorable.
Objective: Introduce the Clock Face & Hands
The goal for Day 1 is for every student to be able to identify the numbers on a clock, the hour hand, and the minute hand. They should understand that the clock face is a circle with numbers 1 through 12 and that each hand moves at a different speed to show different things.
Activity: Meet the Blue Hour Hand & Red Minute Hand
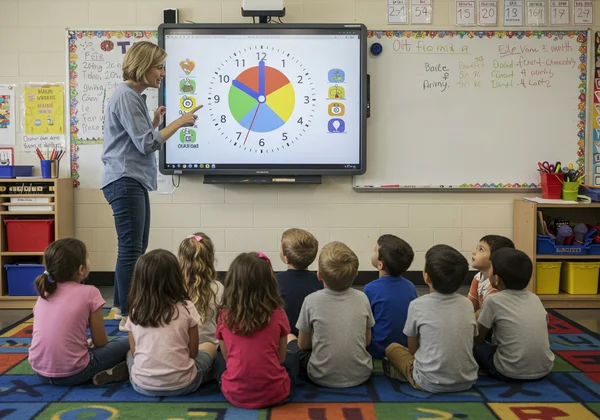
Start by projecting the interactive analog clock on your smartboard. Point out the friendly, colorful design. Introduce the "short and slow" blue hour hand and the "long and fast" red minute hand. Use simple language: "The blue hour hand tells us the hour, and it moves very slowly. The red minute hand is longer, and it tells us the minutes, moving much faster." Have the students repeat the names and colors of the hands.
Tool Focus: Using the Lock Feature for Simple Practice
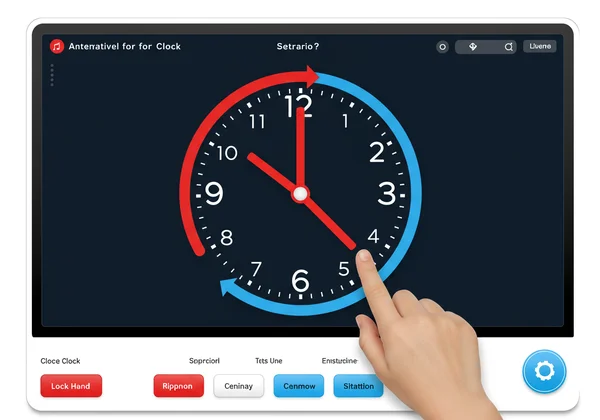
This is where the magic begins. On the Analog Clock tool, use the "Lock" feature to freeze the red minute hand at the 12. Now, you can drag the blue hour hand around the clock. Ask students to call out the hour as you point to different numbers. "If the blue hand is on the 3, it's 3 o'clock!" This focused practice removes the confusion of the second hand, allowing students to master one concept at a time.
Day 2: Perfecting 'O'Clock' and 'Half Past'
With the basics established, Day 2 focuses on the two most common and foundational time-telling concepts: telling time to the hour ('o'clock') and the half-hour ('half past'). These milestones build a huge amount of confidence in young learners.
Objective: Read and Set Times to the Hour
By the end of today's lesson, students should be able to confidently read and set the clock for any 'o'clock' or 'half past' time. This involves understanding that when the minute hand is at 12, it's 'o'clock,' and when it's at 6, it's 'half past' the hour.
Activity: Interactive "Set the Time" Group Game
Turn your lesson into a game. Call out a time, like "Show me 7 o'clock!" or "Who can set the clock to half past 2?" Invite students to come up to the smartboard and use their finger to drag the hands into the correct position. The whole class can cheer them on and confirm if the time is correct. This whole-class participation keeps everyone engaged and provides immediate, positive reinforcement for this new skill.
Tool Focus: Dragging Hands for Instant Feedback
The core feature of the educational clock is its high interactivity. As students drag the red minute hand from the 12 down to the 6, they can physically see the blue hour hand move from one number to halfway toward the next. This visual and kinesthetic connection is something a static worksheet can never provide. The digital display at the top gives instant confirmation, helping students self-correct and learn independently.

Day 3: A Guide to Classroom Clock Practice with Minutes
Now that students are comfortable with the hour and half-hour, it's time to tackle the minutes. Day 3 is dedicated to introducing the concept of counting by fives and reading the time with more precision.
Objective: Understand Counting by Fives
The primary goal is for students to understand that each number on the clock also represents a group of five minutes. They should be able to point to the 1 and say "5 minutes," the 2 and say "10 minutes," and so on, all the way around the clock face.
Activity: "Race the Clock" Minute-Reading Challenge
Let's make minute drills exciting! Use the "Random Time" button on the online learning clock to generate a new time. Challenge students to see who can be the first to correctly count by fives and read the minutes. For example, if the red hand is on the 8, the first student to shout "40 minutes!" wins the round. This gamified approach makes repetitive practice feel like a fun competition.
Tool Focus: Using "Random Time" for Drills
The "Random Time" feature is a teacher's best friend for differentiation and practice. It provides an endless supply of new problems, saving you preparation time. You can use it for quick-fire questions at the start of a lesson, for exit tickets, or for the "Race the Clock" game. This tool ensures your classroom clock practice is always fresh and challenging.
Day 4: Putting It All Together - Reading Any Time
This is the day where all the skills converge. Students will take their knowledge of the hour hand, the minute hand, and counting by fives to read any time on the analog clock. The focus is on synthesis and application.
Objective: Combine Hour and Minute Reading Skills
Today's aim is for students to master the two-step process of reading time: first, identify the hour by looking at the blue hour hand, and second, identify the minutes by looking at the red minute hand.
Activity: "What Time Is It?" Partner Quizzes
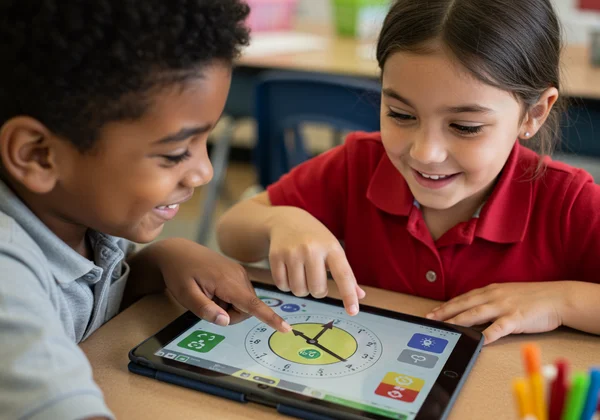
Pair students up with tablets or laptops. One student uses the adjustable clock to set a secret time. The other student has to read it aloud. Then, they switch roles. This peer-to-peer learning encourages collaboration and communication. It also allows students to act as both teacher and learner, reinforcing the concepts more deeply.

Tool Focus: The "Hide Digital Time" Test Feature
The "Hide Digital Time" button is the perfect feature for this stage. It allows students to test themselves without getting the answer immediately. They can set a time, read it aloud, and then click "Show Digital Time" to see if they were right. This function empowers them to practice independently and build confidence in their abilities before a formal assessment. It’s a key part of our fun telling time games.
Day 5: Fun Review and Time Telling Assessment
The final day is about celebrating progress and solidifying the week's learning through fun review games and informal assessment. It's a chance to see how far your students have come and identify anyone who might need a little extra support.
Objective: Solidify Learning with Fun Games
The goal is to review all the concepts from the week in a low-pressure, high-energy environment. This ensures that the knowledge sticks and ends the unit on a positive and memorable note.
Activity: Team-Based Time Telling Bee
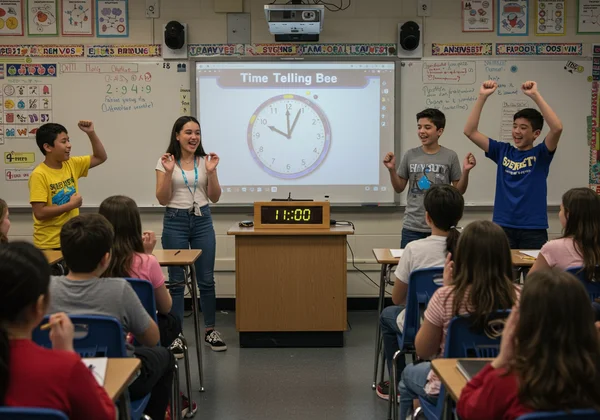
Divide the class into two teams. Project the teaching clock on the board and use the "Random Time" and "Hide Digital Time" features. One member from each team comes to the front. You generate a random time, and the first person to say it correctly scores a point for their team. This friendly competition is a fantastic way to review everything from 'o'clock' to reading precise minutes.

Assessment: Using the Interactive Clock for One-on-One Checks
While the class is engaged in another activity, you can call students to your desk one by one. Use the tool to quickly set 3-4 different times and ask them to read them. This gives you a quick, clear snapshot of each student's mastery without the stress of a formal paper-and-pencil test.
Ready to Make Time-Telling Fun?
This five-day plan turns a tricky topic into an exciting, hands-on journey. Instead of memorizing rules, your students will truly understand time by playing and practicing with a powerful digital tool.
Don't let another lesson fall flat. Bring our "Fun Clock Playground" into your classroom! Bookmark this guide and try our interactive clock today to watch your students' confidence soar.
Your Questions on Teaching Time Answered
How do you explain the hour and minute hand to a child?
The key is to keep it simple and memorable. Use analogies they can understand. The hour hand is "short and slow" like a tortoise because hours are long. The minute hand is "long and fast" like a rabbit because minutes pass by more quickly. On our online analog clock, we make it even easier by color-coding them: the blue hour hand and the red minute hand. This visual cue helps children differentiate their functions instantly.
What age should a child be able to read an analog clock?
While every child learns at a different pace, most children begin learning to tell time between the ages of 6 and 8, typically in first or second grade. By age 6, they can often master 'o'clock' and 'half past.' By ages 7 and 8, they should be able to read the clock to the nearest five minutes and then eventually to the nearest minute. Using engaging tools can help accelerate this process.
Why are analog clocks still taught in school?
This is an excellent question in our digital world! Learning to read an analog clock teaches more than just telling time. It helps develop crucial skills like understanding fractions (quarter past, half past), spatial reasoning, and the concept of elapsed time. It provides a visual representation of time's passage that a digital display cannot, which is foundational for planning and time management skills later in life.