Mastering Minutes: Reading 5 & 1-Min Intervals on Analog Clocks
Welcome, parents and educators! Seeing a child’s face light up when they finally conquer a new skill is one of the greatest rewards. But let's be honest, teaching them to read an analog clock can feel like a huge challenge. Those moving hands and tiny tick marks can be confusing for young learners. You might be wondering, How do you read an analog clock step by step?
You're not alone in asking this question. While we live in a digital world, understanding an analog clock is a crucial skill that teaches children about time, fractions, and counting in a visual, tangible way, reinforcing key aspects of early math learning. With the right approach and our fun tools, this once-daunting task can become a truly rewarding adventure. This guide will break down how to read 5-minute and 1-minute intervals with ease, turning frustration into confident mastery. And to make it even more engaging, we'll show you how our interactive analog clock can transform learning into playtime.
Understanding the Minute Hand: Your First Steps to Precision
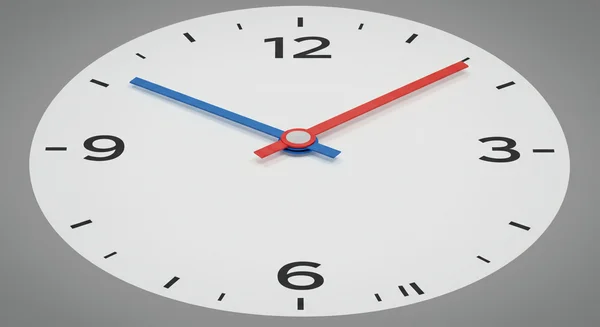
Before we can count the minutes, we need to know which player is which! An analog clock has two main pointers, and telling them apart is the very first step. On a traditional clock, one is long and one is short. Here at Analog Clock, we make it even easier for kids with bright, distinct colors.
Identifying the Blue Hour Hand and Red Minute Hand
Think of the clock hands as a team. The shorter, blue hour hand is the slow and steady one. It points to the big numbers (1 through 12) to tell us the hour. It takes a whole hour to move from one big number to the next.
The star of our show today is the longer, red minute hand. This hand is much faster! It moves all the way around the clock once every hour. Its job is to point to the tick marks to show us how many minutes have passed since the hour began. Making this distinction clear—blue for hours, red for minutes—is a simple visual cue that can prevent a lot of confusion for young learners.
What Does Each Tick Mark Mean?
Now, let's look closely at the clock's face. You'll see 60 small lines, or tick marks, running around the edge. Each one of these tiny marks represents exactly one minute.
When the red minute hand moves from one tick mark to the next, one minute has passed. As it travels all the way around the circle, it passes 60 marks, which equals 60 minutes, or one full hour. Understanding this basic concept—that every little line is a minute—is the foundation for reading time with precision.
Reading 5-Minute Intervals with Ease
Once a child understands that the red hand counts minutes, tackling the 5-minute intervals is the next big leap. This is where the big numbers on the clock pull double duty. They don't just tell the hour; they also serve as convenient shortcuts for counting minutes.
Counting by Fives: The Big Numbers as Minute Markers
This is the magic trick that makes reading an analog clock so much faster. Explain to your child that each big number the red minute hand points to represents a group of five minutes. To figure out the minutes, you simply multiply the big number by five.
Here’s a simple breakdown:
- When the red minute hand points to the 1, it's 5 minutes past the hour (1 x 5).
- When it points to the 2, it's 10 minutes past the hour (2 x 5).
- When it points to the 3, it's 15 minutes past the hour (3 x 5).
- ...and so on, all the way up to the 12, which represents 60 minutes, or the end of the hour (also called "o'clock").
Practicing "counting by fives" is a fantastic way to build this skill. You can chant together: 5, 10, 15, 20, 25, 30, 35, 40, 45, 50, 55, 60! This rhythmic counting makes the concept stick.
Practice Activities for 5-Minute Intervals
Repetition helps, and it certainly doesn't have to be boring! Turn learning into one of your new favorite fun time-telling games. Use our interactive online clock to set the minute hand exactly on the big numbers.
Start by calling out a "five-minute" time, like "25 minutes past," and have your child drag the red minute hand to the correct number (the 5). Then, switch roles. Let them set the hand and you guess the minutes. This hands-on practice builds muscle memory and confidence far more effectively than any static worksheet ever could. According to many leading teaching blogs, interactive learning is essential for retention. The immediate visual feedback helps solidify their understanding of the clock face.
Mastering 1-Minute Intervals for Precision
Once your child is a pro at counting by fives, they are ready to read the clock with perfect accuracy. This involves paying attention to the small tick marks between the big numbers. This final step is what allows them to read any time, not just the easy ones.
The Tiny Ticks: Unlocking Every Single Minute
Remind your child what you first learned: each of those tiny tick marks stands for one single minute. Between each pair of big numbers, there are four small tick marks. These represent minutes 1, 2, 3, and 4 within that five-minute block.
For example, between the 12 and the 1, you have marks for :01, :02, :03, and :04. When the red hand lands on the big number 1, it has reached :05. This pattern repeats all the way around the clock. Learning this empowers kids to stop guessing and start reading the exact time.
Combining 5-Minute and 1-Minute Counts
The most effective way to read a precise time is to combine the two skills you've learned. Here’s the two-step method:
- Count by Fives: Find the last big number the red minute hand has passed. Count by fives to quickly get close to the correct minute.
- Count the Ones: From that big number, count the individual tick marks forward until you reach the red hand. Add this number to your "five-count."
Let's try an example. Imagine the red minute hand is two ticks past the 7.
- Count by Fives: The hand is past the 7. We know 7 x 5 = 35. So, it's at least 35 minutes.
- Count the Ones: It's two small ticks past the 7. So, we add 2.
- Combine: 35 + 2 = 37. The time is 37 minutes past the hour!
This simple, repeatable method breaks down a complex task, making it easy to master. You can practice online now with our tool to master this combination technique.

Fun Ways to Learn & Practice Minutes with AnalogClock.net
Reading about clocks is one thing, but interacting with one is where the real learning happens. Our website was designed as a "Fun Clock Playground" specifically to make this process engaging and effective for kids, parents, and teachers.
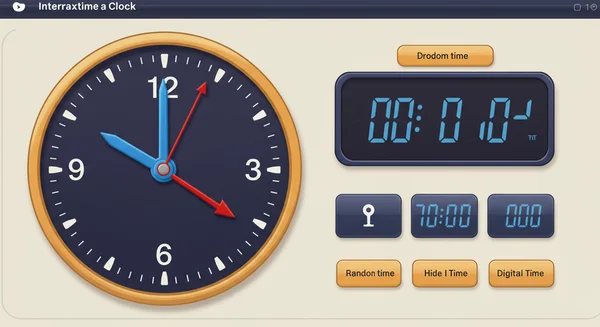
Interactive Practice: Dragging Hands & Random Times
Forget clunky plastic clocks. With our adjustable clock tool, children can use their finger or a mouse to drag the blue hour and red minute hands anywhere they want. As they move the hands, they see the digital time update instantly. This immediate feedback creates a powerful connection between the position of the hands and the numbers they represent.
For a fun challenge, click the "Random Time" button. The clock will jump to a new time, and your child can practice reading it. This is perfect for quick drills in the classroom or at home, turning practice into a fun guessing game.
Hide & Seek: Self-Testing Your Minute-Reading Skills
Ready to test their knowledge? The "Hide Digital Time" feature is your best friend. Set a time on the clock and ask your child to read it. After they give their answer, they can click "Show Digital Time" to see if they were right.
This self-assessment empowers children to lead their own learning. It replaces the pressure of a 'quiz' with the thrill of a personal challenge. They can practice independently, building confidence with every correct answer. It’s a simple but powerful way to solidify their minute-reading skills.
Your Child's Journey to Minute Mastery Starts Now!
Teaching a child to read an analog clock doesn't have to be a chore. By breaking it down into simple, fun steps—from identifying the hands to counting by fives and then adding the single minutes—you can build a strong foundation for success. The key is to provide plenty of positive reinforcement and hands-on practice.
With a clear method and an engaging tool, your child will be telling time like an expert before you know it. They’ll gain not just a practical skill, but also a boost in confidence and a deeper understanding of the world around them.
Ready to put these steps into action? Visit our homepage and let your child explore the free teaching clock. Let the time-telling adventures begin!
Common Questions About Learning Analog Clock Minutes
What age should a child be able to read an analog clock?
Most children are developmentally ready to start learning to tell time on an analog clock between the ages of 6 and 8. Typically, they begin by learning the hour and half-hour marks in first grade and progress to mastering 5-minute and 1-minute intervals in second grade. However, every child learns at their own pace, and understanding these developmental milestones can help you decide when the time is right.
How do you explain the minute hand to a child simply?
The simplest way is to use an analogy. You can call the long red minute hand the "fast hand" or the "big racer" because it has to run all the way around the clock every hour. Explain that its job is to count all the little minutes, and it uses the big numbers as "checkpoints" to count faster by fives.
Are analog clocks better for learning time concepts than digital?
Yes, many educators and child development experts believe so. As highlighted by resources from Scholastic for Parents, analog clocks provide a visual representation of time's passage. Children can see the distance the hands have to travel, which helps them understand concepts like "half past" or "quarter to" and grasp the cyclical nature of time. This spatial understanding is often lost with a simple digital display.
How can I make learning minutes fun for my child?
Gamification is the answer! Turn it into a game by using tools like our interactive tool. Challenge them to set the clock to "snack time" or "bedtime." Use the "Random Time" button for a quick-fire round of "What's the Time?" The more you can make it feel like play instead of work, the more engaged and motivated your child will be.