Kerajinan Jam Analog untuk Kanak-Kanak: Pembelajaran Masa yang Menarik dan Praktikal
Mengajar anak anda membaca jam tradisional boleh terasa seperti tugas yang menakutkan dalam dunia digital hari ini. Kebanyakan kanak-kanak dikelilingi oleh nombor digital pada tablet, telefon, dan bahkan microwave. Bagaimana kita dapat menjembatani jurang antara kemudahan digital dan kemahiran penting membaca jam analog? Ramai ibu bapa dan pendidik mendapati bahawa kanak-kanak mengalami kesulitan apabila masa kekal menjadi konsep abstrak pada skrin rata.
Rahsia kejayaan terletak pada pendekatan multisensori. Aktiviti "hands-on" fizikal menjadikan pembelajaran lebih nyata. Padankan dengan alatan digital untuk keseronokan serta-merta—tiada persediaan diperlukan! Panduan ini meneroka bagaimana menggunakan kerajinan kreatif dan latihan dunia sebenar untuk menguasai jam. Kami akan menunjukkan kepada anda bagaimana menggabungkan aktiviti luar talian ini dengan alat dalam talian kami untuk mencipta pengalaman pendidikan yang lengkap.
Sama ada anda seorang guru yang mencari inspirasi kelas atau ibu bapa yang membantu anak anda di rumah, strategi ini berkesan. Dengan bergerak dari model fizikal ke taman permainan jam interaktif, kanak-kanak mengembangkan pemahaman yang lebih mendalam tentang bagaimana jam dan minit bergerak bersama. Mari kita teroka dunia kerajinan jam dan pembelajaran interaktif.
Membuat Jam Kertas untuk Pembelajaran Taktil
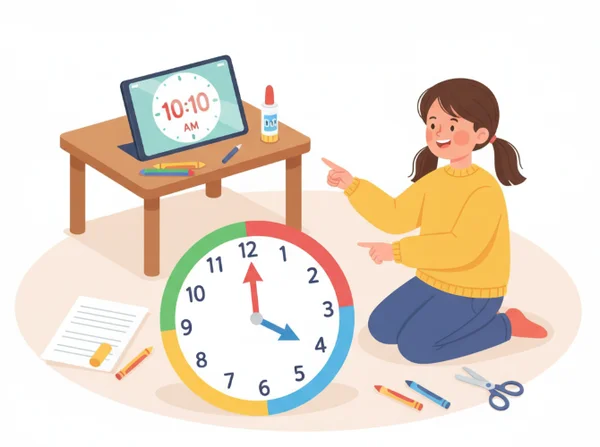
Langkah pertama dalam memahami jam analog adalah membina satu. Apabila kanak-kanak terlibat dalam pembinaan alatan pembelajaran mereka, mereka merasakan rasa pemilikan. Pembelajaran taktil—atau pembelajaran melalui sentuhan—sangat kuat untuk kanak-kanak berusia lima hingga lapan tahun. Ia membantu mereka memvisualisasikan sifat bulat masa, yang sering hilang pada paparan digital linear.
Apabila kanak-kanak membuat jam, mereka merasakan tangan bergerak dan melihat celah antara nombor. Proses hands-on ini membina ingatan otot. Sebelum terjun ke matematik yang kompleks, biarkan kanak-kanak bermain dengan bentuk dan nombor yang membentuk fungsi jam.
Template Jam Boleh Cetak DIY
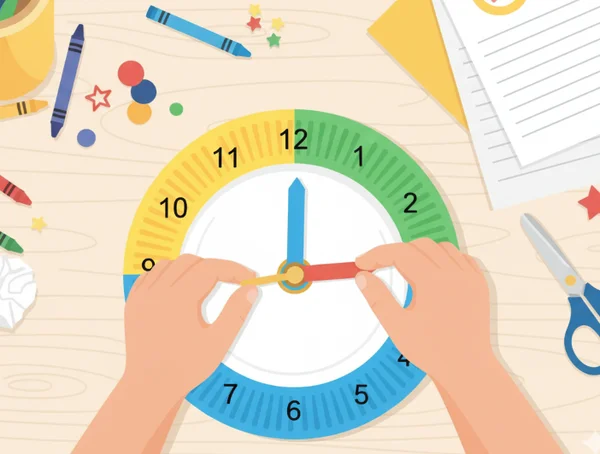
Salah satu cara termudah untuk memulakan adalah dengan menggunakan pinggan kertas sederhana atau template boleh cetak. Anda boleh mencari banyak template percuma dalam talian, atau anda boleh melukisnya sendiri pada kad perkakas yang kukuh. Template jam boleh cetak DIY sangat baik kerana mereka menyediakan susun atur yang bersih dan teratur untuk nombor 1 hingga 12.
Apabila menyediakan templat anda, galakkan anak anda menulis nombor sendiri. Ini membantu mereka mengenali kedudukan nombor "paksi": 12, 3, 6, dan 9. Untuk menyamakan kod warna dalam alat jam interaktif kami, cuba gunakan krayon biru untuk tangan jam pendek dan krayon merah untuk tangan minit panjang. Keperluan ini menjadikan lebih mudah bagi kanak-kanak untuk berpindah antara kerajinan kertas mereka dan versi digital.
Tangan Jam Bergerak dengan Pemegang Kertas
Jam tidak begitu berguna jika tangan tidak bergerak. Untuk menjadikan kerajinan anda berfungsi, anda memerlukan pemegang kertas logam kecil (juga dikenali sebagai brad). Lubangi lubang kecil di pusat tepat pinggan kertas anda. Kemudian, lubangi lubang di pangkal dua tangan kertas anda. Susun tangan jam bergerak dengan tangan jam pendek di atas dan tangan minit panjang di bawah.
Setelah pemegang berada di tempat, tunjukkan kepada anak anda bagaimana tangan bergerak. Terangkan bahawa walaupun mereka bergerak pada kelajuan berbeza dalam kehidupan sebenar, dalam "mod latihan," kita boleh menggerakkannya ke mana sahaja kita mahu. Ini adalah masa yang baik untuk memperkenalkan konsep gerakan "mengikut arah jam". Minta anak anda memutar tangan dan berhenti di tempat rawak. Kemudian, minta mereka meneka apa yang nombor itu wakili. Manipulasi fizikal ini adalah pengantar yang sempurna untuk menggunakan jam interaktif untuk latihan yang lebih maju.
Pemburuan Harta Karun Masa dan Latihan Dunia Sebenar
Setelah anak anda memahami susunan fizikal jam, inilah masanya untuk membawa pengetahuan itu ke dunia sebenar. Aktiviti jam luar talian membantu kanak-kanak melihat bahawa masa bukan sekadar subjek sekolah; ia adalah sebahagian daripada kehidupan harian mereka. Dengan menghubungkan jam ke aktiviti kegemaran mereka, anda menghapuskan faktor "bosan" dan menggantikannya dengan kegembiraan.
Aplikasi praktikal adalah di mana kebanyakan kanak-kanak mengalami momen "aha!" mereka. Apabila mereka menyedari bahawa "3:00 PTG" bermaksud masa untuk snek, nombor pada jam tiba-tiba menjadi sangat penting. Menggunakan permainan dan jadual menukar pelajaran yang membingungkan menjadi cabaran yang memuaskan.
Membuat Pemburuan Harta Karun Berasaskan Masa
Pemburuan harta karun berasaskan masa adalah cara yang hebat untuk mengekalkan kanak-kanak aktif semasa mereka belajar. Berikan anak anda senarai "petunjuk masa" dan jam kertas mereka. Sebagai contoh, satu petunjuk mungkin berbunyi: "Cari mainan yang disembunyikan di tempat di mana kami makan sarapan pada pukul 8:00." Kanak-kanak mesti menetapkan jam kertas mereka ke pukul 8:00 dan kemudian pergi ke dapur untuk mencari hadiah mereka.
Anda boleh meningkatkan kesukaran apabila mereka membaik. Cuba katakan, "Petunjuk seterusnya disembunyikan di tempat di mana kami akan berada dalam 30 minit." Ini menggalakkan mereka berfikir tentang perjalanan masa. Jika mereka terperangkap, mereka sentiasa boleh menggunakan jam pengajaran untuk memvisualisasikan pergerakan tangan minit. Permainan ini menukar tugas "menyeramkan" membaca tangan menjadi teka-teki yang menyeronokkan.
Aktiviti Jadual Harian Jam
Membina rutin harian mengelilingi jam analog adalah kaedah terbukti untuk pemeliharaan jangka panjang. Buat jadual visual pada papan poster. Di samping setiap aktiviti—seperti "Sekolah Bermula," "Masa Makan Tengah Hari," atau "Masa Tidur"—lukis muka jam yang menunjukkan masa tertentu itu.
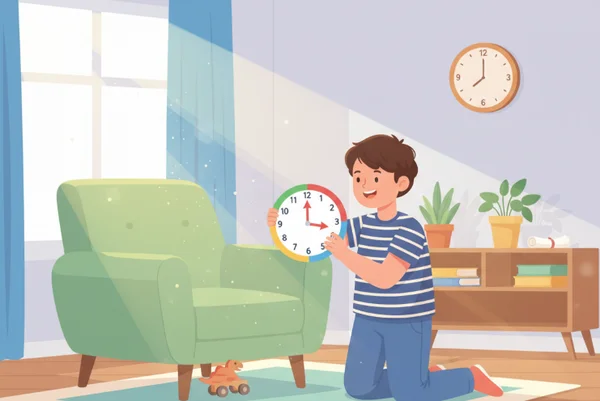
Galakkan anak anda memeriksa jam kertas mereka atau jam dinding sepanjang hari untuk melihat sama ada ia sepadan dengan jadual. Tanyakan soalan seperti, "Jam menunjukkan pukul 12:00; apakah yang jadual kita katakan kita sepatutnya lakukan?" Ini membina kemahiran pengurusan masa dan memperkukuh hubungan antara tangan pada jam dan kehidupan harian mereka. Untuk melatih rutin ini lebih cepat, loncat ke taman permainan jam menyeronokkan kami dan cepat-cepat gerakkan tangan untuk melihat bagaimana satu hari penuh kelihatan hanya dalam beberapa minit.
Alatan Digital Interaktif untuk Latihan Jam Hands-On
Walaupun kerajinan kertas bagus untuk pembelajar taktil, alatan digital menyediakan maklum balas serta-merta yang diidamkan kanak-kanak moden. Cara terbaik untuk mengajar masa adalah menggunakan kedua-duanya. Kanak-kanak boleh membina jam dengan tangan mereka dan kemudian mengesahkan kerja mereka menggunakan simulasi digital. Kaedah "pemeriksaan berganda" ini membina keyakinan dan memastikan mereka tidak mengamalkan kesilapan.
Alatan digital menawarkan ciri yang tidak boleh diberikan jam kertas, seperti keupayaan untuk segera menyembunyikan atau menunjukkan masa digital. Ini membantu menjembatani jurang antara jam analog tradisional dan jam digital yang mereka lihat di merata-mana. Dengan menggilir antara kedua-duanya, anda mencipta persekitaran pembelajaran yang seimbang.
Menggunakan Simulasi Visual untuk Pemeriksaan Latihan
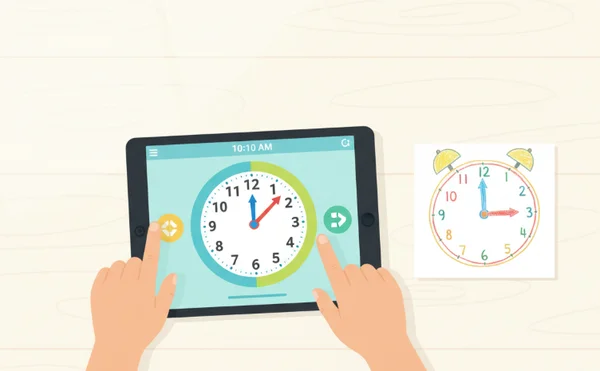
Selepas anak anda menetapkan masa pada jam pinggan kertas mereka, minta mereka "menguji" diri mereka sendiri. Mereka boleh pergi ke simulasi jam visual kami dan menyeret tangan digital untuk menyamai kerajinan fizikal mereka. Alatan kami akan segera menunjukkan masa digital di bahagian atas skrin.
Jika masa digital sepadan dengan apa yang mereka fikirkan, mereka mendapat peningkatan keyakinan! Jika tidak, mereka boleh melihat dengan tepat di mana tangan sepatutnya berada. Butang "Masa Rawak" di laman web kami juga sempurna untuk ini. Klik butang untuk mendapatkan masa rawak, kemudian minta kanak-kanak mereplika masa tepat itu pada jam kertas mereka. Hubungan balik antara dunia fizikal dan digital ini memperkukuhkan konsep membaca jam untuk kanak-kanak dengan cara yang kekal dalam ingatan mereka.
Lembar Kerja Boleh Cetak dengan Pengintegrasian Digital
Ramai pendidik menggunakan lembar kerja masa hands-on untuk menjejaki kemajuan. Ini biasanya menampilkan beberapa muka jam kosong di mana pelajar mesti melukis tangan. Untuk menjadikannya lebih menarik, integrasikan dengan latihan digital. Minta pelajar menggunakan ciri "Sembunyikan Masa Digital" di laman web kami untuk mencabar diri mereka sendiri.
- Lihat lembar kerja dan cari masa yang diperlukan (contohnya, 4:30).
- Gunakan jam analog dalam talian untuk menetapkan tangan ke 4:30.
- Lukis tangan pada lembar kerja tepat seperti yang mereka lihat pada skrin.
- Klik "Tunjukkan Masa Digital" di laman web untuk mengesahkan mereka betul.
Kaedah ini mencegah kekecewaan yang sering datang dengan lembar kerja tradisional. Daripada menunggu guru untuk menilai kertas mereka, pelajar mendapat kepuasan serta-merta. Ia menukar tugas soliter menjadi permainan interaktif, menjadikannya salah satu permainan menceritakan masa yang paling berkesan.
Melihat anak anda membuka keajaiban menceritakan masa adalah kegembiraan murni—terutamanya apabila kerajinan, permainan, dan permainan digital digabungkan! Mengajar kanak-kanak menceritakan masa adalah perjalanan yang memerlukan kesabaran, kreativiti, dan alatan yang tepat. Dengan memulakan dengan kerajinan jam analog, anda menyediakan asas taktil yang diperlukan kanak-kanak untuk memahami dunia fizikal.
Dengan menggabungkan pemburuan harta karun dan jadual harian, anda memberi pengetahuan itu makna dunia sebenar. Akhirnya, dengan mengintegrasikan alatan digital, anda menyediakan maklum balas serta-merta dan keseronokan interaktif yang mengekalkan kanak-kanak terlibat. Ingat bahawa setiap kanak-kanak belajar pada kelajuan yang berbeza. Beberapa akan menyukai pemegang kertas dan pemotongan, sementara yang lain akan mahu menghabiskan semua masa mereka mengklik butang pada tablet mereka. Kuncinya adalah menyediakan pelbagai cara untuk berinteraksi dengan konsep masa.
Cuba tukar ruang tamu atau bilik darjah anda menjadi taman permainan jam yang menyeronokkan hari ini. Mulakan dengan membina jam kertas anda, dan kemudian cubalah alat percuma kami untuk melihat betapa mudahnya anak anda menguasai tangan masa. Dengan sedikit kerajinan dan banyak keseronokan, anak anda akan membaca jam seperti pakar dalam masa singkat!
Kesimpulan
Pada usia berapa yang terbaik untuk memulakan mengajar masa dengan kerajinan?
Kebanyakan pendidik mencadangkan memulakan sekitar usia lima atau enam tahun, yang biasanya sepadan dengan Pra-Sekolah atau Tahun Satu. Pada usia ini, kanak-kanak mempunyai kemahiran motor halus untuk membantu dengan kerajinan jam analog dan mula memahami urutan nombor asas. Walau bagaimanapun, anda boleh memulakan lebih awal dengan hanya bercakap tentang tangan biru dan merah pada jam interaktif kami untuk membiasakan mereka dengan bentuk.
Berapa banyak masa skrin yang sesuai untuk aktiviti ini?
Kami percaya pada pendekatan berimbang. Menggunakan alatan digital untuk 10 hingga 15 minit sebagai "pemeriksaan" untuk aktiviti fizikal sangat berkesan. Kerana alatan kami memberi tumpuan khusus pada pendidikan dan bebas daripada iklan yang membingungkan, ia adalah bentuk masa skrin yang sangat berkualiti. Anda akan cepat melihat bagaimana sesi singkat membawa kepada peningkatan besar.
Adakah aktiviti ini boleh membantu kanak-kanak yang mengalami kesulitan dengan konsep masa?
Ya! Kanak-kanak yang mengalami kesulitan sering mendapati kaedah tradisional terlalu abstrak. Pendekatan multisensori—melihat, menyentuh, dan menggerakkan tangan jam—membantu "menanamkan" konsep itu dalam otak mereka. Maklum balas serta-merta yang disediakan oleh alatan interaktif sangat membantu untuk kanak-kanak yang berasa risau tentang membuat kesilapan. Mereka boleh membetulkan diri mereka secara persendirian dan serta-merta.
Di manakah saya boleh mencari lebih banyak template jam boleh cetak?
Banyak laman web pendidikan menawarkan muat turun PDF percuma untuk muka jam. Walau bagaimanapun, anda tidak memerlukan apa-apa yang canggih! Pinggan kertas putih sederhana dan dua helai kertas berwarna seringkali merupakan alatan terbaik. Anda boleh menggunakan panduan rujukan jam analog kami sebagai senarai semak visual untuk memastikan nombor dan tangan anda diletakkan dengan betul sebelum anda menampalnya.
Seberapa kerap kita harus berlatih aktiviti menceritakan masa?
Keperluan adalah lebih penting daripada tempoh masa. Berlatih selama 5 minit setiap hari jauh lebih baik daripada berlatih selama sejam sekali seminggu. Cuba sertakan "Cabaran Masa" ke dalam rutin sarapan atau tidur harian anda. Gunakan ciri masa rawak kami sekali sehari untuk mengekalkan kemahiran tajam, dan anda akan melihat kemajuan yang menakjubkan!